I cut my first dovetails with a western backsaw that three men had sharpened and none had set properly. The cuts wandered. I blamed my marking and bought a better pencil. It took an older carpenter about ten minutes to show me the saw was the problem, not the pencil. A ryoba works on a different principle. It is a Japanese saw with teeth on both edges of one thin blade, rip teeth on one side and fine crosscut teeth on the other, and it cuts on the pull stroke, toward you, instead of pushing away from you. The SUIZAN 9.5 inch ryoba is the one that lives on my bench now, hanging under the front edge where I can reach it without thinking about it.
The mechanics explain everything else here, so it is worth thirty seconds. A push saw has to be stiff enough not to buckle under the force behind it, which is why the plate is thick, the kerf is wide, and the saw fights the wood on the way through. A pull saw is in tension while it cuts, so it can be thin. The SUIZAN blade measures 0.02 in, about 0.5 mm, and it leaves a kerf of roughly 0.03 in, 0.8 mm. That narrow kerf is not a marketing figure. It is the difference between a saw that removes wood and a saw that separates it. Less wood removed means less tearout at the exit and a shoulder line that stays where you put it. It also means the plate will kink if you treat it like a western saw.
The saw that stays on the line all the way to the last inch
SUIZAN Ryoba Double Edge Saw, 9.5 inch. Rip teeth on one edge, 15 TPI crosscut on the other, one blade held by one screw. It is the tool I reach for before any other saw in the shop.
Amazon Check Today's Price on Amazon →The Five Steps, in Order
What follows is the order I actually work in, which is not always the order it looks best written down. If you only take one step from this page, take the second one, because most bad joints are decided in the first half inch of the cut.
Step 1: Get the work up where you can see the line
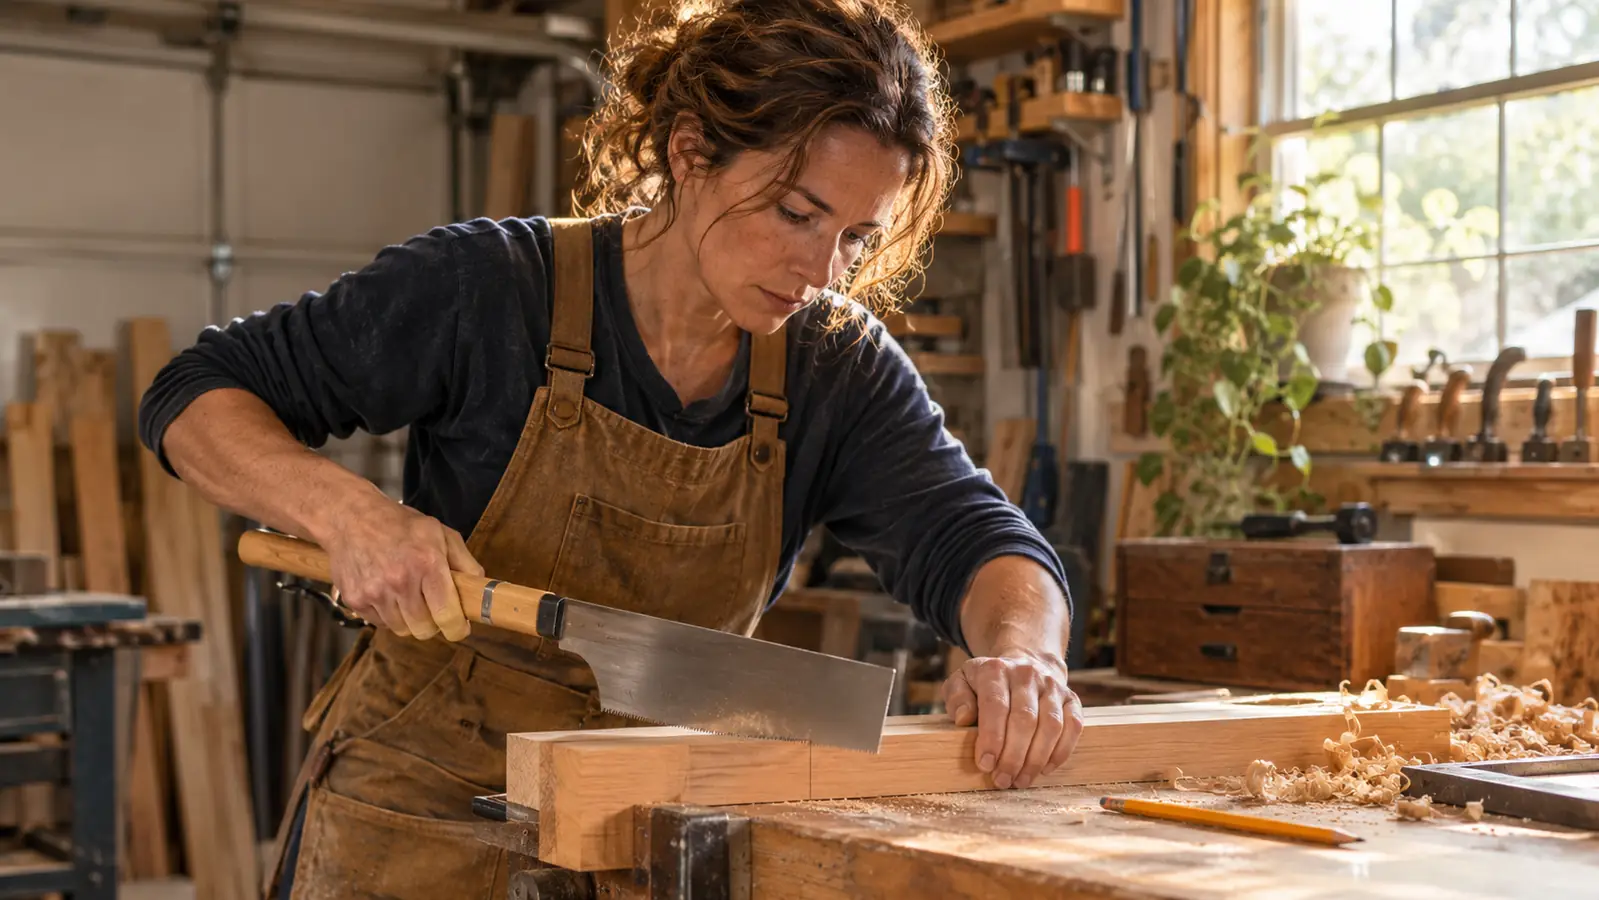
The most common reason a cut goes wrong has nothing to do with the saw. It is that the woodworker cannot see the line. If the board is clamped at chest height and you are looking down at a steep angle, the plate hides the line for the whole stroke and you end up steering by hope. Clamp the work so the marked line sits about a foot from your eyes while you are standing at the bench. On my maple bench that means sliding a piece of scrap underneath, or moving the whole board to the end of the bench where I can stand over it properly.
Face the waste. A ryoba cuts on the pull, which means the teeth come toward you and the far side of the cut is the side you cannot watch. Mark your line, put a single pencil cross on the waste side, and orient the board so the waste is nearest you. Now the line sits on the far edge of the kerf where your eye can track it, instead of buried under the plate for the length of the board.
Then fix the light. One bright source, low and off to the side, throws a shadow line down the plate and makes the pencil line stand up. I have a lamp clamped to a shelf near the window for exactly this, and I use it more than any jig in the shop. It sounds fussy until you cut a shoulder in flat overhead light and find out you were a 32nd off the whole way and never saw it coming.
Step 2: Start the kerf with almost no pressure
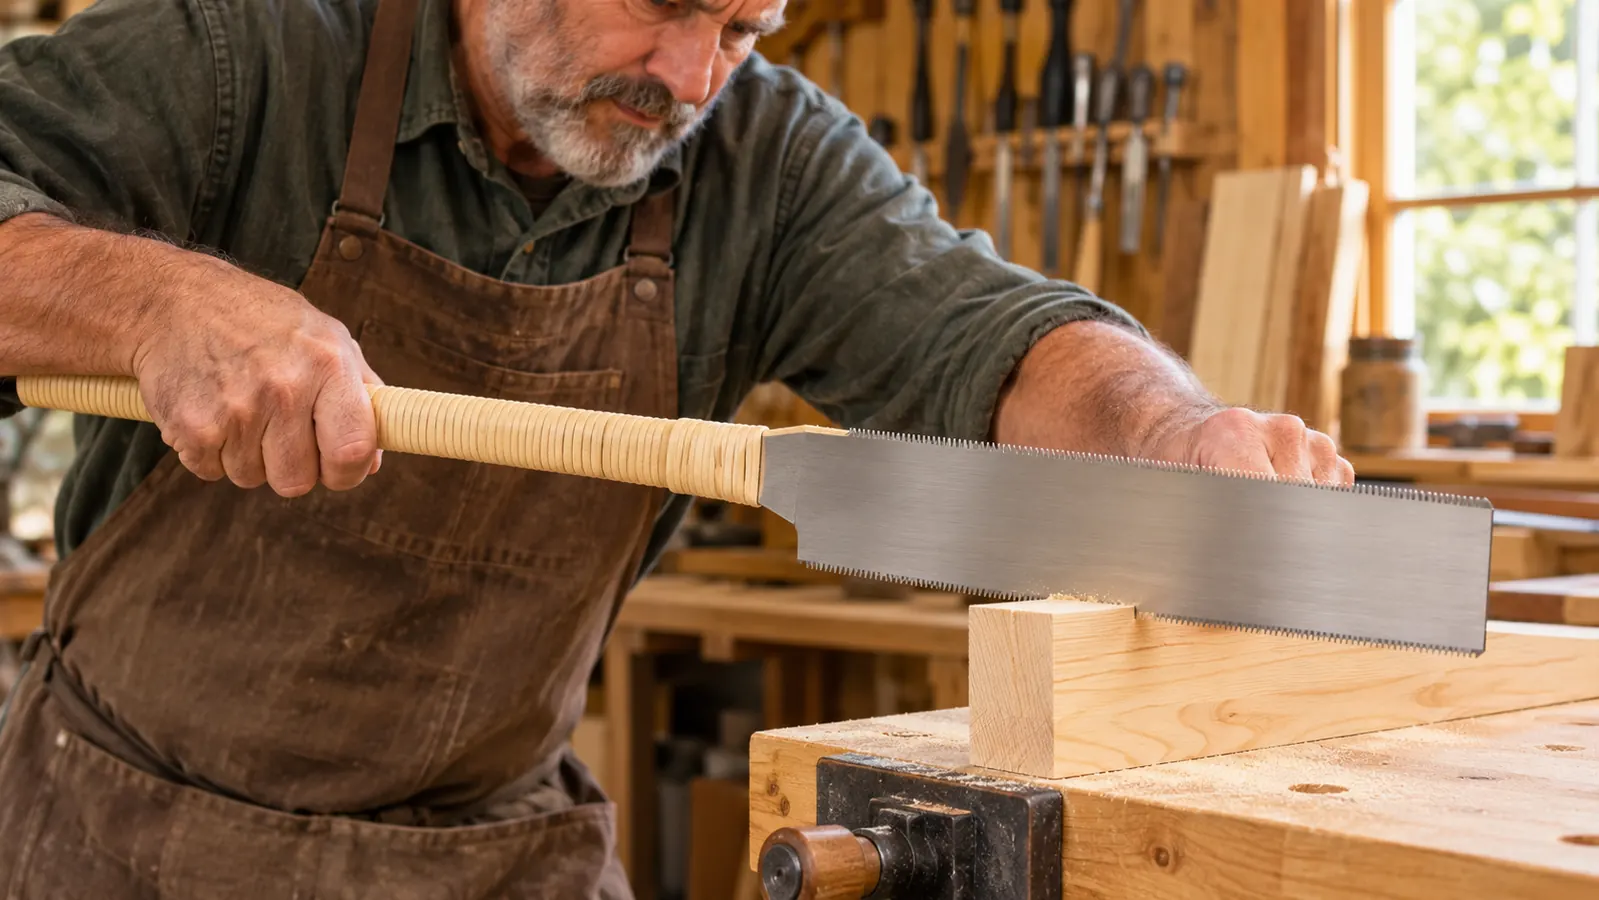
Start with the fine crosscut teeth, the 15 TPI edge, and start with the saw almost flat to the board. Lay the blade on the far corner with the teeth just touching the line, brace your thumb against the plate as a fence, and pull back two or three inches with no downward pressure at all. You are not cutting yet. You are registering the teeth in the wood so they cannot jump out and start a second kerf somewhere useless.
Once a shallow kerf runs across the full width of the corner, bring the saw up to your natural angle over the next two or three strokes. Do not begin at your sawing angle. Starting steep makes the teeth skate and chews a notch where you did not want one, and that notch is permanent, because every stroke after it follows the same groove down the board.
The first inch decides the joint. Check it before you commit to the cut. Take the saw out, sight the kerf from the end of the board, and confirm it is square to the face. If it is drifting, spin the board and start from the opposite corner, because a kerf entered from the other end will meet itself and correct. Fixing a drift at inch one takes ten seconds. Fixing it at inch six takes a plane and a new piece of stock.
Step 3: Steer with the plate, never with the handle
Use the full length of the blade. Short choppy strokes heat the plate, load the teeth and leave a stepped kerf that shows up later when you pare the shoulder. Long even pulls, letting the weight of the saw carry the cut. The whole saw measures 23.2 in end to end and weighs 0.2 kg, so it does not need your shoulder behind it. If you find yourself pressing hard, either the teeth are dull or you are cutting on the wrong edge.
Steering is where a thin blade punishes bad habits. If the cut starts to wander, the instinct is to twist the handle to bring it back. On this saw that is the worst thing you can do, because the handle is levering a plate only 0.5 mm thick and it will bend long before it turns. Straighten the wrist and the shoulder instead, so the whole saw rotates as one line. If that is not enough, stop, back out of the kerf, and re-enter from the far corner.
Kinks are permanent. I learned that on a piece of white oak I had already spent an hour dimensioning by hand. I forced a cut that had gone off, the plate bowed, and that blade never ran true again. I keep it in a drawer to remind myself. The saw is not fragile if you let it do the work. It is fragile the moment you decide you know better than the teeth.
Step 4: Turn the saw over instead of forcing the wrong teeth
You are holding two saws in one tool, and the usual mistake is to pick a favourite edge and never change it. The rip teeth, 9 TPI, cut along the grain: tenon cheeks, dados, the long cuts when you are breaking down a board to size. The crosscut teeth, 15 TPI, cut across the grain: shoulders, tenon ends, anything where the surface has to come away clean. Forcing rip teeth across a shoulder is how you get a splintered line you then have to explain.
Switching edges means turning the saw over in your hand, nothing more. Do it deliberately and re-register your grip before the next stroke. What feels like a small thing at the start of a cut becomes a crooked shoulder by the end of it, because your hand remembers the angle of the last twenty strokes whether you want it to or not.
When the teeth dull, and they will, the blade comes off a single screw. Loosen it, slide the old blade out, and fit a SUIZAN 9.5 in ryoba replacement blade, which is sold separately. Keep the blade guard on it between uses. Japanese saws of this type are impulse hardened, which is the reason they stay sharp so long and also the reason you cannot file one back to life the way you would a western saw. There is a 30 day warranty on the tool, so staple the receipt into your tool drawer and forget about it.
Step 5: Pare to the line and stop judging by eye
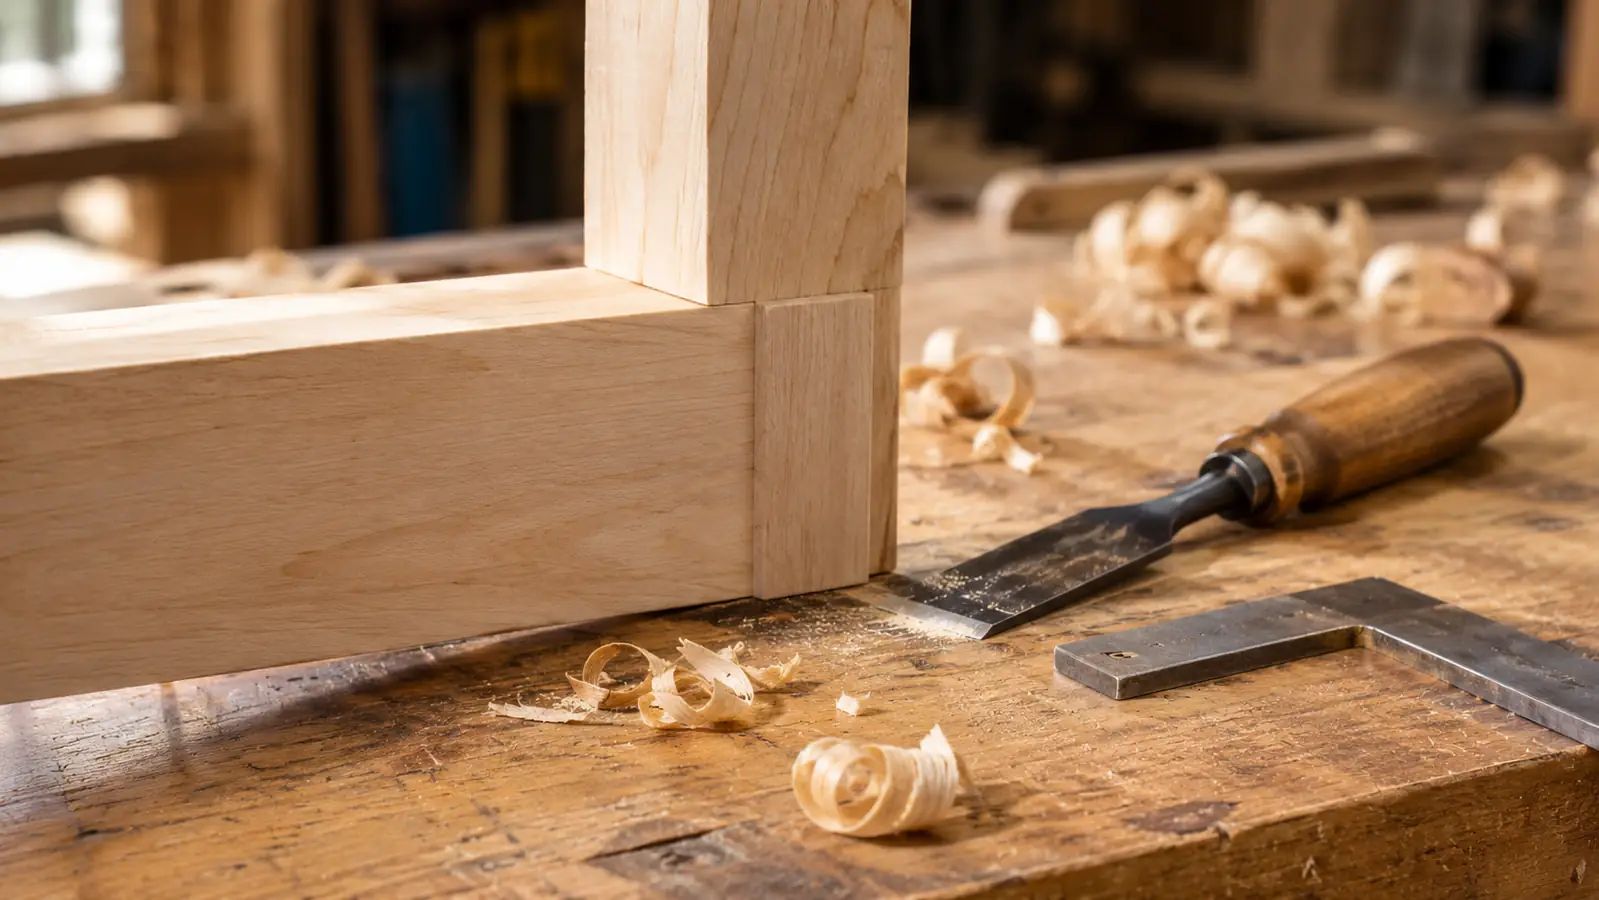
No saw cuts to a line you can trust for a joint. It gets you within a 32nd or so, and then the chisel takes over. Register the flat back of the chisel on the shoulder and pare inward from the outside edges toward the middle, so the last fibres break in the waste rather than on the corner everybody will look at. A sharp chisel and a light hand remove less than you think, which is the point.
Check the fit with the joint dry and check it in decent light. Sight down the shoulder line for a gap, rock the two pieces against each other for movement, and put a small engineer square on the face. If the joint rocks, the shoulder is proud somewhere and you will chase it around with a block plane for an hour. Find the high spot and pare that, not the whole face.
Then relieve the middle slightly. A joint that touches at the edges and clears by a hair in the centre will pull up tight and stay tight. One that touches everywhere will fight you going together and open up again in a dry New Hampshire February. This is the step nobody photographs, and it is most of the difference between a joint that looks right and one that is right.
What Else Helps
Support the offcut. A board that drops at the end of the cut tears out on the underside and grabs the blade just as you are finishing, which is exactly when you are least careful. Set a scrap of the same thickness under the far end, or keep the overhang to an inch or less. It costs nothing and it saves the piece you have already spent the morning on.
Practise on scrap pine before you touch the good stock. Pine is soft, it is cheap, and it will show you what your pull stroke actually does, which is not always what you believe you are doing. Twenty minutes of practice cuts on a length of pine has saved me more oak than any jig I have ever bought.
Keep the saw where it can hang, not where it can be buried. Mine hangs under the front edge of the bench, guard on. A saw that lives loose in a drawer of mixed tools loses teeth to chisels and screws, and a saw with two chipped teeth will leave two scratches down every joint you cut with it. Hanging it also means you pick it up without thinking, which is how a hand tool earns its place in a small shop.
The blade is half a millimetre thick. Force it and it kinks. Guide it and it goes exactly where you are looking.
Two edges, one blade, and a kerf narrow enough to leave your line alone
SUIZAN Ryoba Double Edge Saw, 9.5 inch. Rip teeth for the cheeks, 15 TPI crosscut teeth for the shoulders, and a plate you turn over in your hand rather than a second saw you have to buy.
Amazon Check Today's Price on Amazon →